

How To Repair Dash Clock On 1962 Thunderbird Youtube
Removing Nuance Switches and Controls
 Gil'due south Garage
Gil Baumgartner
CTCI Authenticity Chairman
Removal of dash switches, etc is a adequately uncomplicated chore that tin be accomplished without special tools or you lot tin purchase a bezel removal tool from virtually Thunderbird parts dealers. Two types of bezel removal tools are pictured in photograph #1. Either type works very well.
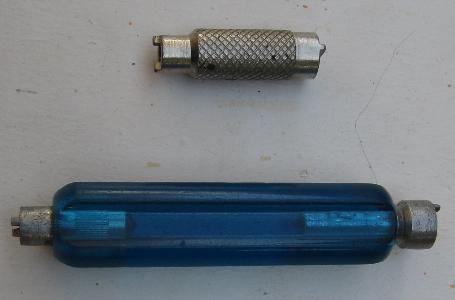
The bezel removal tool has two different size ends. The larger cease is for removing the ignition switch bezel; the small cease removes the headlamp switch, wiper controls and heater switch.
Removing the Switches and Controls
The following procedures require going nether the dash.
Before starting disconnect the battery.
Exist sure to tape the wire colour codes and locations.
We'll get-go the removal procedures with the headlight control switch.
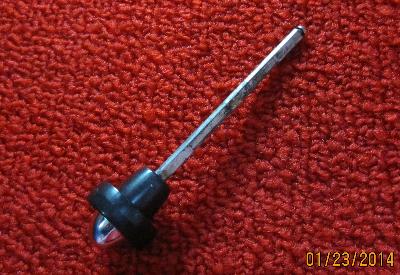
The first step is to remove the Headlight knob and shaft from the headlight switch unit. Removing the knob and shaft will provide access to the headlight retaining bezel.
Photo #2 shows the release button for the headlamp switch knob and shaft, Press and concur the release push while pulling and twisting the knob and shaft, this allows the shaft and knob to be pulled out of the switch.
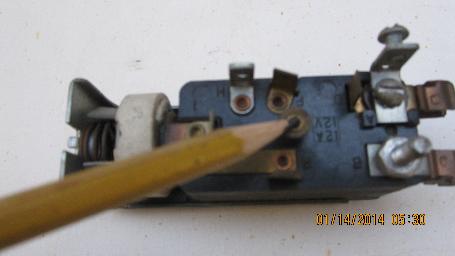
Photo #three shows the Headlight knob and shaft after its been removed.
With the shaft removed, the retaining bezel tin can exist removed with the special tool by inserting the small terminate of the tool in the bezel slot and turning counter-clockwise. The headlight switch tin can at present be dropped downwardly from behind the dash and the wires removed.
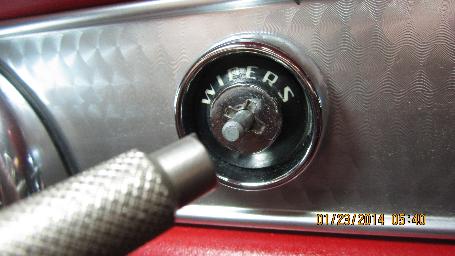
To remove the wiper command, we must outset remove the wiper command cable past going under the dash and disconnecting the cable at the wiper motor. Then remove the command knob by loosening the knob prepare screw; the knob tin then be pulled off the shaft.
With these items removed insert the small cease of the bezel tool (photo #four) over the shaft and engage the bezel nut, plough counter-clockwise to remove.
The cable assembly can and so be removed by pushing the shaft housing forward and out from under the dash.
The heater on/off switch is removed in the aforementioned mode.
The left air vent cablevision is removed by outset removing the retainer clip and cable end from the flapper valve lever in the engine compartment. Adjacent go under the dash and remove the retainer nut from the cable. Pull the cable straight back into the drivers compartment.
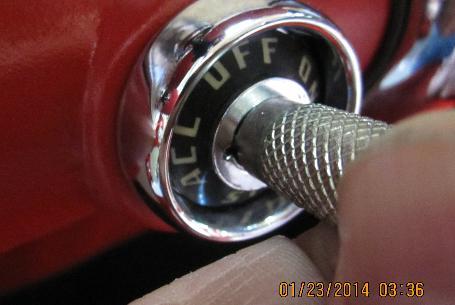
Photo #5 – The ignition switch assembly is removed by inserting the large cease of the tool, into the bezel nut and turning counter-clockwise. The switch can be moved forrad and then dropped downwards from the dash enough to disconnect the wiring and remove the switch.
The lighter assembly can be removed by going under the dash to disconnect the ability wire, then turn the sleeve housing (under the dash) counter-clockwise to remove it. Once the sleeve is removed the lighter assembly tin be pushed out of the dash.
The radio can exist taken out by first removing the control knob set screws and pulling knobs off. Then become nether the nuance and remove the antenna wire and speaker wire by pulling them out.
Note: use caution not to pause the three-prong pin retainer on the speaker wire.
Remove the electrical connections to the radio. One wire provides power to the radio. Disconnect this wire at the fuse. The other wire is for the radio low-cal.
The side by side stride is to remove the mounting bracket retainer nuts – ane on each side of the radio. Then remove the shaft nuts that were exposed when the knobs were removed. Push the radio forward; drib the end down, and rotate the radio associates to remove it from nether the dash.
The heater control is held in place from the dorsum side of the dash by two retainers, one on each side, equally shown in photo #six.
First remove the three wire control cables from the command levers, note the color code wire band on the terminate of each cable tubing shield then that you tin supersede them in the same positions. Band codes are besides constitute on page 219 and 262 of the restoration manual.

For complete dash restoration refer to the CTCI Restoration Transmission.
If you failed to note the wire color lawmaking and positions before removing them from the switches, complete wiring codes with pictures can be found in the Electric transmission available from CTCI.
Gil Baumgartner
Return to Gil'southward Garage
Source: https://www.ctci.org/removing-dash-switches-and-controls/
Posted by: emrichhoured52.blogspot.com
0 Response to "How To Repair Dash Clock On 1962 Thunderbird Youtube"
Post a Comment